Print

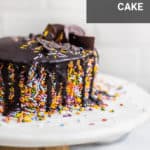
Vegan Buckeye Cake

5 Stars 4 Stars 3 Stars 2 Stars 1 Star

5 from 3 reviews

A perfectly moist vegan chocolate layer cake topped with peanut butter frosting, sprinkles, fudge sauce, and more! You’ll love this easy cake recipe for any occasion!

Ingredients

CAKE:
1/2 cup Bob’s Red Mill Organic All-Purpose Flour (affiliate link)
1/3 cup Bob’s Red Mill Organic Whole Wheat Flour (affiliate link)
6 Tbsp. cocoa powder*
1 tsp. baking powder
1 tsp. baking soda
pinch salt
1/2 cup + 1/3 cup raw cane sugar
1 tsp. apple cider vinegar
1/2 cup almond milk, at room temperature (I used unsweetened vanilla)
1/4 cup melted coconut oil
1/4 cup dairy free yogurt**
1/2 cup strong hot coffee
FROSTING: 
5 Tbsp. vegan butter, at room temperature
1 cup natural, no-stir peanut butter
1 cup powdered sugar
splash vanilla extract
pinch salt
24 Tbsp. almond milk
TOPPINGS:
sprinkles, fudge sauce, vegan peanut butter cups, chocolate chips, etc.

Instructions

  1. CAKE: Preheat your oven to 350 degrees F. Grease the bottoms of two 6″ aluminum round cake pans with melted coconut oil. Line the bottoms with parchment paper (use this method), then grease and flour the parchment paper and sides of each pan.
  2. Sift all-purpose flour, whole wheat flour, cocoa powder, baking powder, baking soda, and salt into a large bowl. Add raw cane sugar, and whisk to combine. Set aside.
  3. Add apple cider vinegar to a liquid measuring cup. Then pour room temperature almond milk to the 1/2 cup line. Mix to combine. This is your vegan buttermilk!
  4. Add melted coconut oil, yogurt, and hot coffee to the bowl of your stand mixer with the paddle attachment. Add your “buttermilk,” then start the motor on low. Slowly add your dry ingredients until everything is combined. The batter will be on the thinner side. Taste the batter. Seriously. So good.
  5. Divide the batter into your two prepared cake pans (you can eye-ball it), and bake from 20-25 minutes, or until a toothpick comes out clean. My layers weren’t perfectly divided into two, so one cake took 20 minutes and the other took 25. Just start checking at the 20 minute mark, and you should be good to go.
  6. Allow your cakes to cook completely on a wire cooking rack before removing them from their pans. I covered mine with some plastic wrap and stuck them in the fridge overnight.
  7. FROSTING: The next day, add all of the frosting ingredients (except the almond milk) to the bowl of your stand mixer with the whisk attachment, and whisk until combined. Start on low so the powdered sugar doesn’t get everywhere. Drizzle in the almond milk with the motor running to thin as needed. You want it thick but spreadable.
  8. ASSEMBLE: Carefully level your cakes with a serrated knife. Place one cake on a plate/cake stand, and add a dollop of frosting. Smooth to the edges. Top with your second cake, flat-side up, and frost the entire thing. Top with your favorite toppings and dive in! I like serving straight from the fridge because everything firms up a bit which makes cutting easy!

Notes

*Use only natural cocoa in the cake. You can use dutch-processed cocoa or natural in the frosting (I used natural).
**I use So Delicious vanilla.
***This frosting is enough for a thin crumb coat. I’m not a huge frosting fan, so this was perfect for me. If you want the whole crumb coat / final coat look to your cake, double the frosting recipe.
Cake adapted from the queen, Sally at Sally’s Baking Addiction & frosting adapted from fellow Pittsburgher, Michelle at Brown Eyed Baker.

Pin It on Pinterest

Share This